


By Lindsey Partridge (formerly Forkun)
Have you ever heard someone say “that was a long spot” or “you really chipped in there?”
 Learning to jump takes patience and time, for both you and your horse. Allowing your horse the time to build confidence over fences will ensure he’ll trust you to jump any fence, from any distance, and most importantly, he’ll want to jump for you.
When your horse wants to jump for you, he’ll make the extra effort to leave all the rails up, give the best jumps, and be forgiving of rider errors.
It can take a couple of years before a horse can consistently determine the correct take off spot. When someone says a horse had a long spot, it means the horse jumped further from the fence than what would be ideal. When this happens you can get left behind the motion and because the horse has to give a big leap to get over the fence from such a big distance, he might knock the fence down—usually with the hind legs.
If the horse chips in, then he was deeper to the base of the jump than what would be ideal. When that happens, the horse ends up having to pop upward more quickly and may not be able to get his front end up in time without hitting the fence with the front legs.
A horse’s stride is 10 to 12 feet long, and the perfect take off spot is about six feet from a 3’6” fence.
When cantering to a jump, if your horse finishes a canter stride 12 feet before a fence, he has the option to take off from that really long spot, or he can try and chip in a short stride but then only have a take off distance of one to three feet.
If given an approach of more than three canter strides to a jump, horses can usually adjust their stride long before the jump so that you get a nice take off spot. A ‘caretaker’ is a horse that finds the perfect spot to the fence without rider help nearly every time—taking care of his rider by providing safe take off spots.
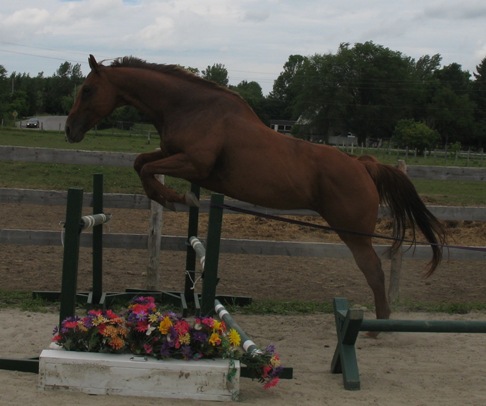
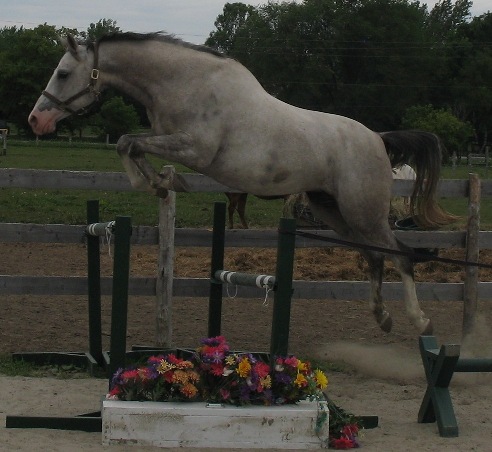
When teaching your horse to jump, it’s a good idea to start either on the lunge or by free jumping. Free jumping can allow your horse to practice finding the right take off spots and striding without rider interference.
To free jump your horse, make sure you set up a safe area with safe fencing, proper footing, and nothing that your horse can get tangled with. Set up a chute so that once your horse is given a straight approach to the first jump, and so the horse can’t run out on a line of fences.
 Set up tall jumps parallel to the existing arena wall, only allowing enough space in between the two ‘walls’ for a jump. Be careful that the horse can’t sneak between the wall and the jump and potentially injure himself. Alternately, you can set up a few jump standards in a line parallel to the existing arena wall and use a rope/caution tape/ribbon to connect each standard and create a wall. Just be sure to use something that will be visible to the horse. Caution tape is great because it will break easily if he gets caught up in it. Set up your jumps, first starting with poles.
When free jumping, send your horse through the chute a few times, making sure he’s warmed up and the distances between jumps are correct. Base the stride on 10 to 12 feet plus room for take off and landing. When the jumps are 3’6” you can assume about six feet for landing and six feet for take off. Less landing/take off space is required for smaller jumps or if the horse trots to the first fence in the line.
You can set up one or two stride combinations to start. Once your horse is more athletic and experienced, you can set up bounces (also termed an ‘in and out’) where the horse jumps in and out again without any strides in between (about 9 to 10 feet between jumps if the horse trots in and the jumps are around two feet).
Start with poles so your horse can figure out the routine and warm up, then raise the last pole in your sequence to a cross rail. Be sure to remember that the distance between poles will be different than when they become jumps because you have to allow for take off and landing.
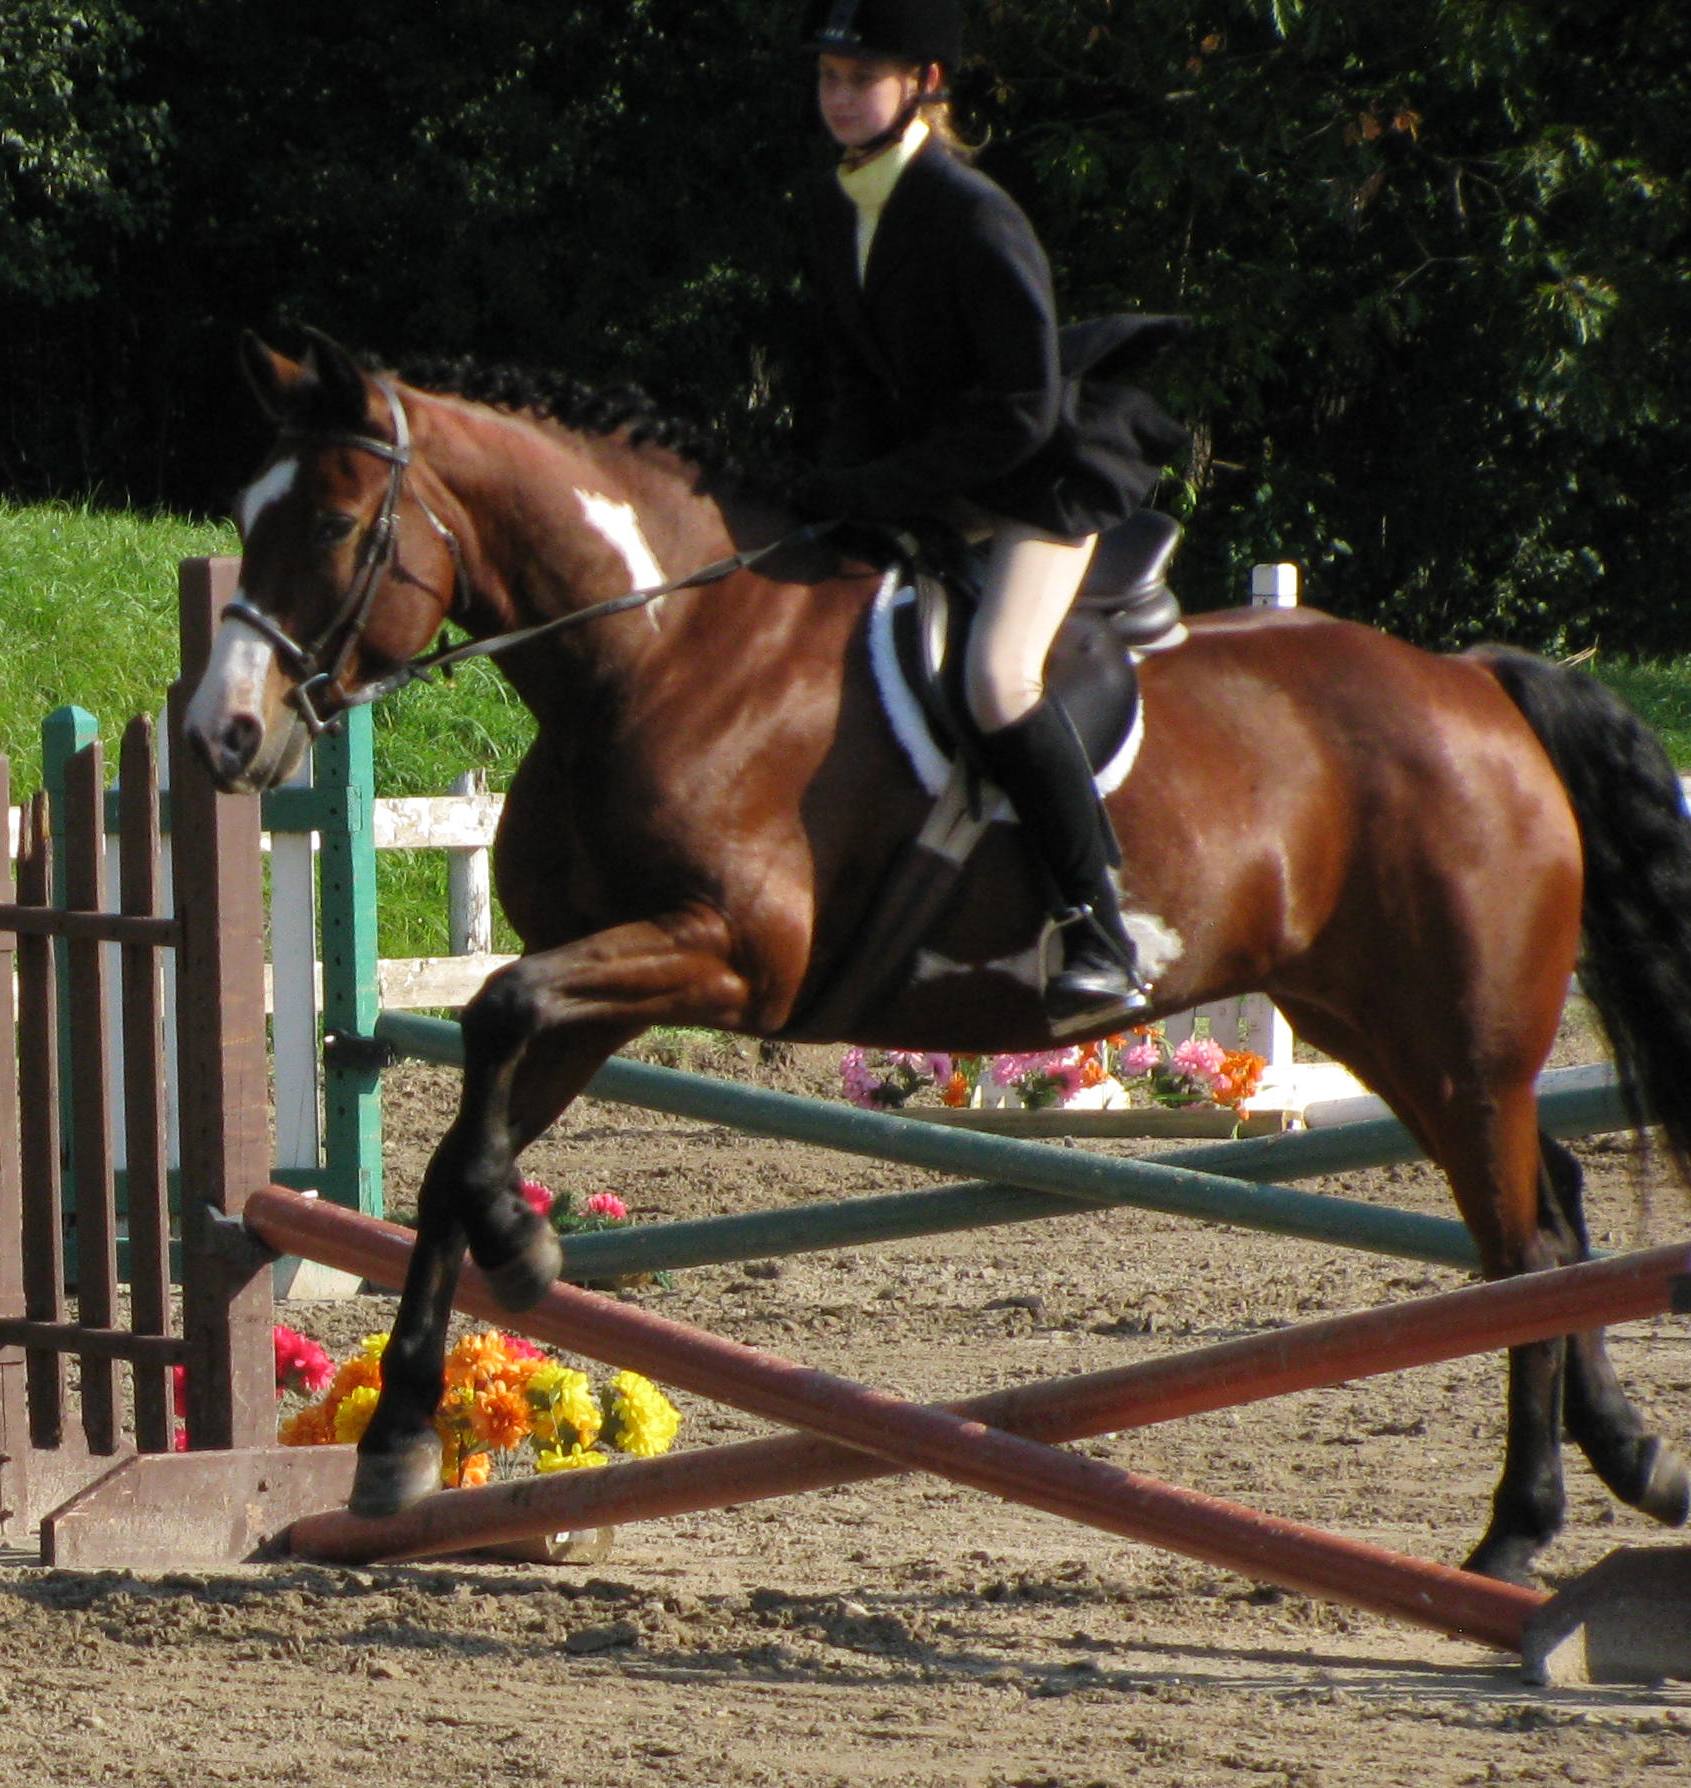 Use a cross rail in order to encourage your horse to find the centre of the jump (a cross rail jump is pictured right). After a couple of warm up jumps, then build the middle portion of combination.
It is good to have your horse free jump through combinations (more than one jump in a row) so that your horse can learn the correct spacing for strides to jumps (because you will set the jumps the proper distance a part).
Have your horse do this once or twice or until he goes through smoothly, and then put up the beginning of your combination and make sure your horse can go through smoothly at the cross rail height before raising any jumps. Leave the first jump a cross rail and you can raise the other jumps in your sequence behind it.
This will keep the grid inviting and encourage your horse to be centered because the lowest point in the fence is at the centre. Raise one fence at a time, allowing your horse to jump the grid when you make a change, and do not advance the grid until your horse can master the preceding level.
You can use ramp oxers (first rail lower than the second rail) to encourage a bascule (rounded form) when jumping, versus a hollow back (deer like) jump. Be careful not to over stress your horse—keep in mind his fitness level and remember that jumping is fatiguing and puts more stress on your horse than basic flat work.
With a fit horse, free jumping should be done a maximum of once per week to allow recovery and rebuild time for the horse’s muscles, joints, and tendons. If your horse was pushed to the limit in a free jumping session, his next exercise session should be relaxed. Do a loose rein trot with a little canter to allow him to recover and rebuild. Not allowing recovery time can strain your horse and cause injury. Encourage your horse to carry a low head set in order to stretch his back muscles.
Typically, when free jumping, you’ll always send the horse through the grid in the same direction for an entire session because the jumps will be set up for one direction. If the grid is all cross rails or all poles then you can send the horse in both directions, but only if it is set up to canter in. If the grid is set up to have a trot in approach, then the landing/take off distances will be different for the 2nd and 3rd jump than the 1st and 2nd jump, even if they are both 1 strides; this is because the horse will be trotting to the first one, but cantering the second. Because you usually take the trot in approach and the grid is set up to be jumped only one way, try and warm up and cool down the horse in the opposite direction that you were jumping. Try to switch up the direction each free jumping session in order to try and keep the work more balanced so that your horse doesn’t develop a weak side.
Allowing your horse to jump without a rider on his back will help him to figure out his own balance and stride without worrying about rider interference. Riders can interfere in many ways with a horse’s jumping and it’s important that you have an experienced and capable instructor and an experienced and capable horse when you’re learning to jump.
You should be in a two point position when jumping. Stand up, fold from the hips, keep a bend in the knee, look forward, weight down in the heel, and move your hands forward toward the horse’s mouth over the fence. This position keeps you in the centre of balance when the horse jumps. It also brings your hands forward, giving more length to the rein and allowing the horse to lower his head and neck to jump properly.
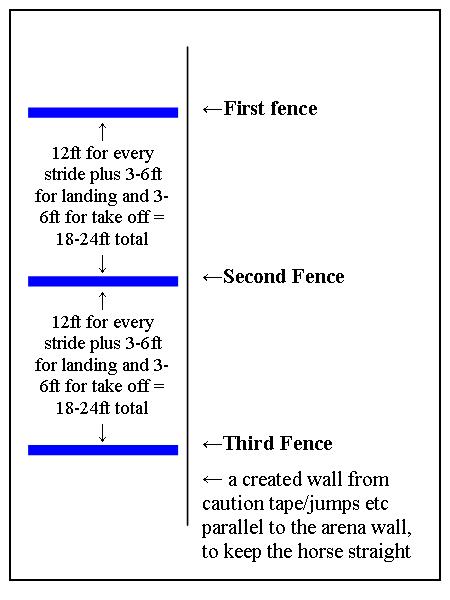
Example distances for a combination:
Example 1: Trotting into the first fence for an average size horse
1st fence (trotting in)
18ft (one stride with the horse trotting in)
2nd fence
21 ft (canter stride, with fence 1 and 2 being below 3ft)
3rd fence
Example 2: Cantering into the first fence for an average size horse
1st fence
24ft
2nd fence
24ft
3rd fence
